Saturday, 7 November 2009

Art Project - Invisible Ink

Who wouldn't want to be able to leave secret hidden messages for their friends, or have a diary with what looks like blank pages but infact is written in invisible ink? Well here's how you can go about it.


Lemon Juice

  • Either use some bottled lemon juice or squeezer some real lemons, the bottled option is probably easier.
  • Once you have your juice either using a paintbrush, your finger or even a cotton ear-cleaner stick write your message on some paper, white is probably best.
  • Allow the message to dry on the paper.
  • To read the message hold the paper up to a source of light or heat, either sunlight or carefully to a lightbulb or maybe over a heater (again carefully).
  • The heat causes the writing to darken to a pale brown so you can read the message.
  • Another way is to put salt onto the drying "ink" and after a minute or so wipe clean and then colour over with a crayon to reveal the message.
  • Other liquids can have the same effect, try using milk, orange juice, vinegar, or apple juice.


Baking Soda

  • Mix equal parts of baking soda and water.
  • On white paper write your message with either paintbrush, your finger, a cotton bud or something else similar.
  • Allow the message to dry on the paper
  • To read the message use a light or heat source (as mentioned above with the lemon juice), the writing will turn brown.
  • Another way to read the message is to paint over the message with purple grape juice.

Wax crayons

On a white piece of paper and using a white crayon write your secret hidden message
Using some watered down paint brush over the paper and thus your hidden message is revealed. You could use a different colour piece of paper but make sure the colour crayon you use matches the colour paper. This method probably works better for very young children and can be used to make fun drawings/paintings too.

Friday, 6 November 2009

Life through a lens - Callum Part I

Callum

One of my favourite subjects to photograph is my son Callum. If you look through my flickr photostream he will probably be the subject I have most photos of. lol. Sometimes he is a willing participant and others not so willing and then there are the "secret shots" I get of him. I'm often asked which is my favourite photo of him and to this date I've never been able to narrow it down to just one and then of course my favourites can often change. There are some that I like because the capture the essence of Callum, there are some I like because it's just a good shot and there are some I like because it reminds me of the moment I caught that photo.

Here's a selection of a few of my favourite and why I like them.


Callum and Dash.

These two have a love/hate relationship. You'd never guess from this photo (well OK maybe you would by the fact it looks like Callum looks more like he is strangling the dog than hugging him) that they do but boy have they had some fall outs. Callum actually asked the other week if we could put Dash up for sale on EBay so that the money raised he could use to help save endangered animals. Hubby pointed out the flaw in this plan by saying they would be lucky to get just £1 for the dog and that wouldn't help the pandas out much. And don't be fooled by the husband, he loves the dog! Anyway I love this photo because both Callum and Dash have a nervous energy about them and it is so hard to get them on their own to stay still for a photo let alone together, this is one of those rare moments.


Summer Fun

Do you see how muddy that pool is? Do you see the bit of grass stuck in his hair? And do you see the bug he's is so interested in? I know all kids get dirty, muddy, play with buys etc, but I'm sure my little monkey monster is the best at it. Seriously that paddling pool had only been filled up a few hours before and look at how dirty he got it, but he doesn't even care he's sitting in a paddling pool full of dirt, stones, grass and lots of bugs. lol. I look at this and think "Yep that's my boy." What I also love about this shot is how long his eye-lashes look. One of the first things people comment on about Callum is his big blue eyes and his very long eye-lashes, seriously he has eye-lashes to make any girl jealous.


No, no, no, no, no!

See he isn't always co-operative, but I can use that to my advantage sometimes. lol. Also this shot reminds me of how he can always get rips in the knees of his jeans but that won't stop him from wearing them, heck even when we had snow earlier this year, enough to shut down the schools, he still went out to play in the snow with jeans on just barely held together at the knees by a thread. Another thing... the boy doesn't stop growing, he costs us a small fortune in jeans, trousers etc.


Snow is my favourite and my best

Although technically this photo isn't good it is one of my all time favourite shots. These two loved the snow so much and I just couldn't get them indoors. Callum threw snowballs at Dash who jumped up and wanted more thrown at him. It's what childhood is about.


An ill spider-callum

This is one of hubby's favourite. He looks at it and tells me it's just a brilliant photo. It's also a rarity to get a shot of Callum like this, even ill he never rests up.


My own little water babe

Everyone I know who sees this photo loves it... and then they ask how wet my camera and I got. Not a drop on either, that's what a zoom lens is for. There is so much to love about this shot and it's one of those "secret shots". It was a hot summer's day, not a cloud in site and the sprinkler on with music blasting out in the background and my little monkey monster enjoying playing with the water. He'd keep running and jumping over and through the sprinkler and giggling away. I look at this and think what it would be like to be a kid again and enviously wish in a way I could.

So there you have it a few of my favourite shots. I have a lot more but I didn't want to bore you rest assured though I'll do another of my favourite shots post.

Thursday, 5 November 2009

Life through a lens - Guy Fawkes Night

Happy Guy Fawkes, have fun and stay safe.


What is fireworks without Sparklers and a warm fire to stand by?


Callum and his cousin Alex have a sparkler battle


Brrr it's cold


Firelight glow


Don't get too close

Wednesday, 4 November 2009

Art Project - Bang, Whizz, Boom!!!


Continuing with the theme of Guy Fawkes's Night today we talk about fireworks.

There are a couple of fireworks art projects that Callum and I do. One is on the computer using basic paint and the other is with black paper/card and chalks although if you want to brave it you can use paint but be prepared for mess with paint.


Painting fireworks on the computer.

  • Open up paint
  • Set your "paper" to whichever size you want
  • Colour fill it black (this is the tin of paint tipped a bit to the side icon)
  • Click airbrush (the spray can icon) and pick which size you want, I find the smallest is best
  • Pick a colour
  • Click and hold in the left hand of your mouse and quickly flick up in a straight line, do this various times with a starting point at the same (look below for example)
  • Choose various colours and airbrush sizes and continue until you are happy with your firework picture
  • The bigger/larger the fireworks the nearer they look and vice versa with making them smaller
  • Be sure to save your finished piece of work to your computer

Quick drawing I did


Chalk Fireworks

This has always been a favourite of Callum's.

1. Get some black paper or card
2. Get some chalks, various colours are best
3. As above on the computer drawings choose a colour and draw lines going up and out, you can either do this in one straight line, dotted lines or a bit of both, alternate with different colours
4. Continue doing this until you are happy with your drawing
5. If you wish you can give it a smokey feeling by gently smudging the chalk to make it look like all around is smokey

Of course this way you can do various methods, use paint brushes and just paint normally, or use the paint brushes and do flicks to make the fireworks or you could use watery paint and a straw and blow through the straw onto the paint on the paper and make lines that way. Experiment and see what you come up with.

Fireworks Display Mobile


I found this fun little project on a website called Activity Village, rather than do a lengthy post here I'll just add a link, it looks simple enough to do and lots of fun. Here is the link.


As always I would love to see any pictures or photos of your works of art. Have fun and stay safe.

Tuesday, 3 November 2009

Art Project - Penny for the Guy


Remember remember the fifth of November
Gunpowder, treason and plot.
I see no reason why gunpowder, treason
Should ever be forgot...


This week over this side of the pond we celebrate Guy Fawkes Night which has always been a favourite of mine. For those that haven't heard of this night here is a brief summary of it.

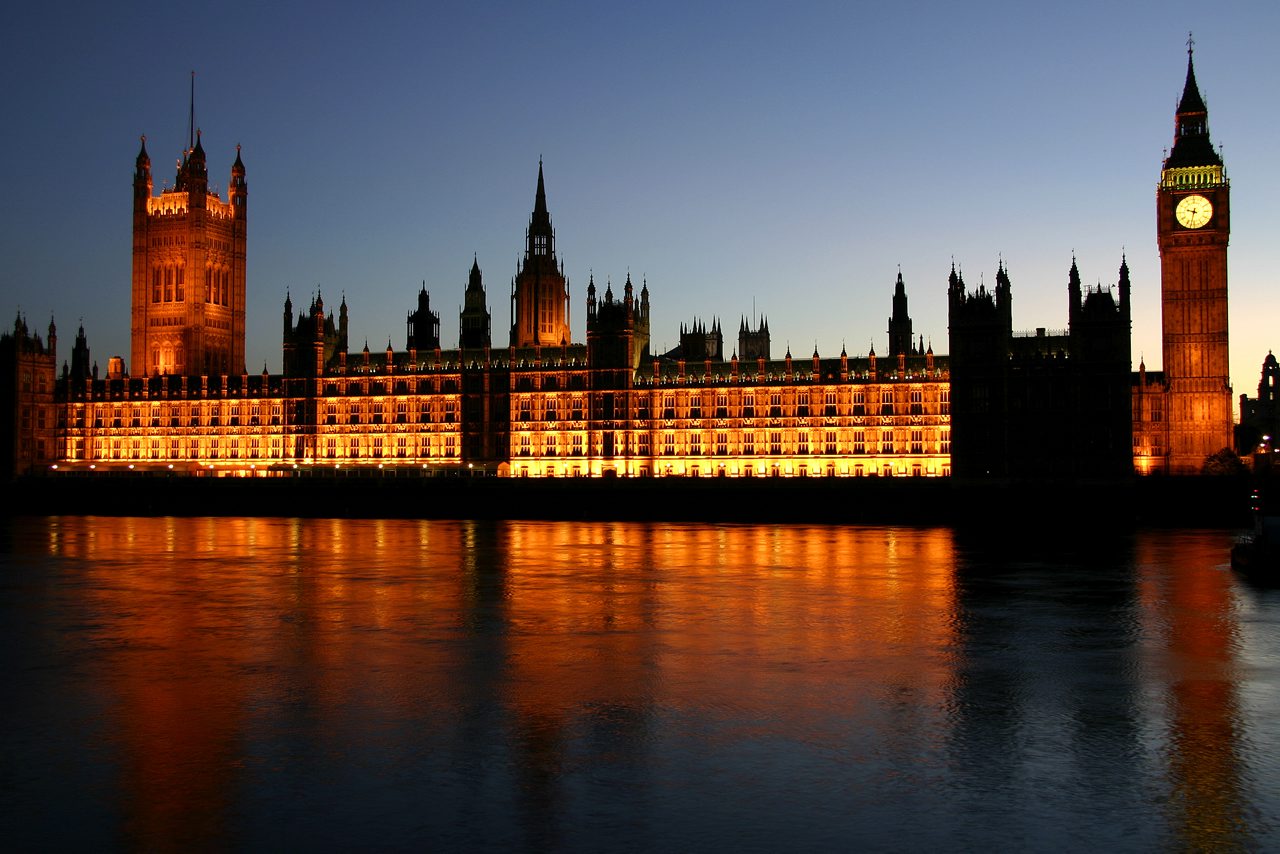
In 1605 Guy Fawkes was caught under the Houses of Parliament with a large amount of gunpowder and a match. He was part of a group of Roman Catholic Restorationists whose aim was to displace Protestant rule by blowing up the Houses of Parliament. Even though he was not in charge of this plot it was left for him to carry out it's execution and thus that was why he was in the cellars underneath the Houses when a search was carried out due to an anonymous tip off. He was tried, found guilty and sentenced to be hung, drawn and quartered. To ensure the crime was never forgotten and that treason would not be tolerated thus was born Guy Fawkes Night where we were encouraged to light bonfires to celebrate the King's (James I) escape from assassination.

Apart from bonfires and fireworks on Guy Fawkes Night another tradition is to have an effigy of Guy Fawkes called (I know original!) "a guy". For many many years children would make a guy out of old clothes and newspapers and go around asking for "a penny for the guy." you would often find them outside supermarkets, on street corners etc sitting there with their guy and asking for a penny. Then on the evening of Guy Fawkes the "guy" would be thrown on the bonfire. Sadly the Penny for the Guy is a tradition if not already died out slowly dying out. People still make their guys but they are just for the bonfire.

Which leads me on to today's art project. How to build a guy!


What you will need:

1. Some old clothes, preferably dungarees or trousers and a jumper with a hood but if not an old woollen hat, a pair of gloves and socks if you want
2. Lots of old newspapers and if you also have any some leaves
3. Paper Bad
4. Pens
5. String


How to assemble:

Scrunch up the newspapers (and leaves if you have any) and stuff them into the old clothes, if you have trousers and a top you can tuck the top into the trousers and stitch around the top of the trousers to secure the top in place or if it has belt loops you can use some string as a belt and tighten them together that way.

Next on one side of the paper bag draw a face and then stuff that with scrunched up newspaper (and again leaves if any). Once full up enough tie the top of it tightly with some string so the filling stays inside but be sure to leave some paper at the bottom to form a neck.

Place you paper bag head into the top of the jumper. If you have one that has a hood attached pull that up to keep the head in place. If not place your woollen hat on the paper bag head and then carefully place the head into your jumper and stitch the hat to the jumper.

If you have gloves and socks, fil these with scrunched up paper and attach via the arm and legs holes either with string tied to keep them in place or with stitching

And now your guy is ready! Enjoy Bonfires Night and Remember Remember fifth of November.


PHOTOS WILL FOLLOW LATER THIS WEEK, ONCE WE'VE BUILT OUR GUY.

PLEASE NOTE PHOTO NOT MY OWN, FOUND ON londontravelogue

Monday, 2 November 2009

Life through a lens - Time


I think that pretty much anyone who reads this blog will know that in March 2010 Daz and I are expecting our second child, I just thought I'd say that so it explains this photo a little more.

This morning I was sorting through a suitcase and holdall we had retrieved from my in-laws containing pretty much all the baby clothes we'd kept of Callum's. Even though we don't know if we're having a boy or girl there are plenty of clothes there that we can use for either. While sorting through those I came across a pair of Callum's old shoes. It's hard to imagine that my size 2 shoe wearing six year old son once fitted into these. Anyhow I thought I'd take a photo to compare his current England trainers to his old baby shoes. In real life the difference in size is a lot bigger than what this photo leads you to believe.

Sunday, 1 November 2009

Art Project - The Robot With No Name


In this day and age we are actively encouraged to recycle as much as we can. Which can lead to some fun art projects. Callum's various schools have had various people in to talk about recycling and to Callum's it's become a big thing. Often he'll come to me and say "Mummy this can be recycled, can we keep it for some art recycling fun?" which of course I don't mind. However we do have a limit on how much we keep and what we keep for these projects and we have a box that we put things in for future use and other stuff does go in our recycling boxes outside our home for collection by the rubbish men.

So during the week Callum and I thought we'd delve into our recycling art project box and see what we could come up with? Mostly we had toilet rolls that had been finished with and a few boxes of various sizes. I suggested that maybe we make a car out of them but Callum suggested a robot which was way more fun and cooler.

As well as our recycling box we also have an all round art box, full of paper, pens, paint, glue, stickers, etc. We started by covering a small box in art card to make the face of our robot and Callum then used pens to draw a face on but you could use stickers (those wobbly stick on eyes are fun) or cut out shapes from paper/card and stick them on or use parts of an egg box (you could make a nose for example), anything really. Next we cut a strip of card the length of the box and cut slits in this to make spiky hair and stuck this onto the back of the box (the opposite side to our face). We then covered the toilet rolls with card but if you wanted you could colour or paint them, it's up to you really. We then stuck two together to make the body and then under this two more next to each other but running along the under-side of the body to make legs. To make it extra secure we also used sellotape. All that was left then was some feet and hands. Callum drew around my hands and we cut them out and stuck them inside the toilet roll one each side and then we drew a funny shape and stuck those to the bottom of the feet to look like shoes. And ta-da our robot was made. All that was left was to the decorate as we wished. As it was Halloween Callum wanted to stick some spooky bat stickers on the hands and he made a kind of calendar/mobile phone to be stuck on the front. It was a fun project and kept us entertained for an hour or so and Callum now has a cool robot to play with.

So give it a try, see what you've got lurking in your recycling box that you could make into something, there's plenty you can do and I have plenty of ideas for future days too. If you do make something I'd love to see your finished result so please feel free to post a picture here for all to see.